How to download, customize and
upload
Crystal Cloud Graphics .zip files of web set templates page 2.
Even if you think your concern is an issue of specific part below, be sure that is isn't something you didn't do in another section.
It is recommended to read through all the parts.
Part 1: Saving .zip file, opening .zip file and setting up the proper folders to store the files.
Part 2: Editing and customizing template.
Part 3: Creating a page from the customized template.
Part 4. Uploading files for proper viewing.
13. Modify the blank title graphic in the graphic program of your choice. Save the modification (rename the file to one of your choosing when you save it) and save it back into the same "Images" folder all the template graphics are. If you do not have a graphic program to do that, email me. Include the filename of the graphic you need modified! In this example it would be "islam9blanktitle.jpg" I offer thousands of free graphics, I need to know what you want modified! If you need buttons modified, do the same process of modification, renaming, saving to the "images" file.
14. If you haven't already, download and install a simple free editor program. The rest of this tutorial is based on you using NVU which you can download at: http://www.nvu.com/ I personally like it better than KompoZer which you can download from the same page...for me KompoZer crashes too often, which is really, really annoying. This tutorial will work for both programs.
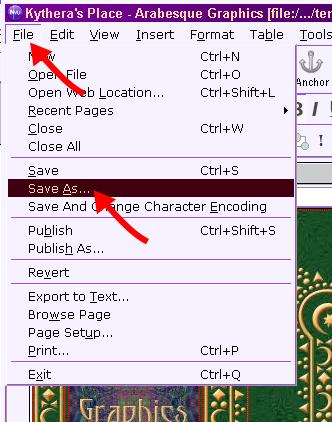
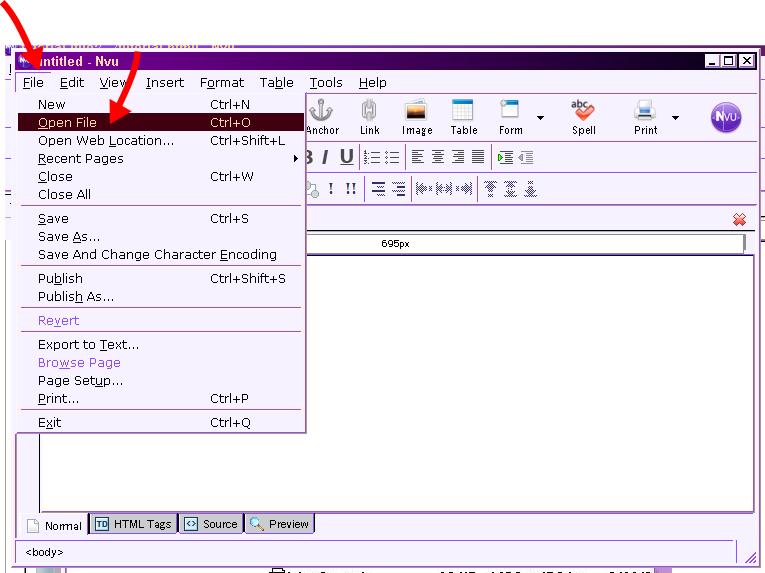
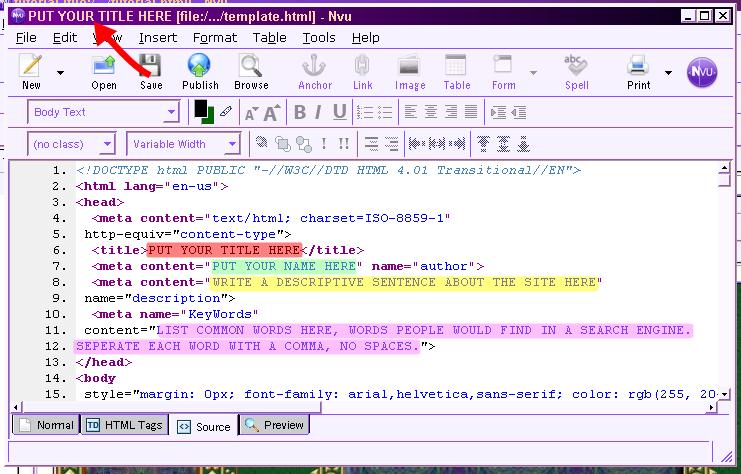
15. Open the NVU program, click the word "File" and a menu will open, click the option "Open File"
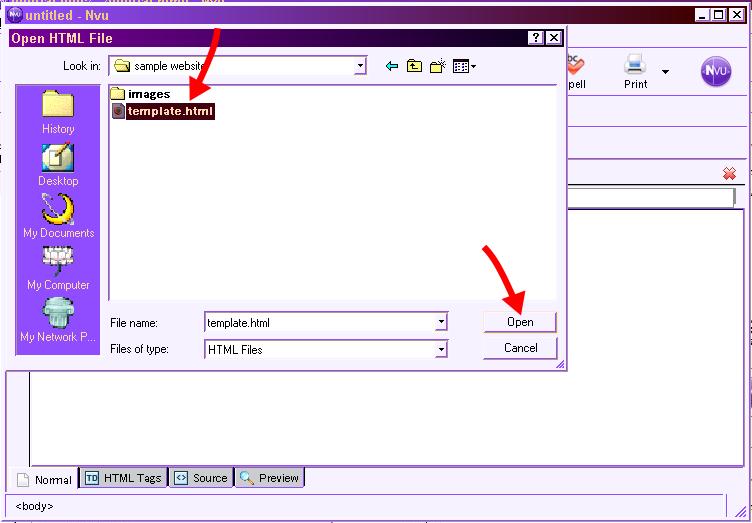
16. Open the "template.html" you transfered from the .zip file into your website folder.
17. You should now see the template page with images, click the tab that says "Source"
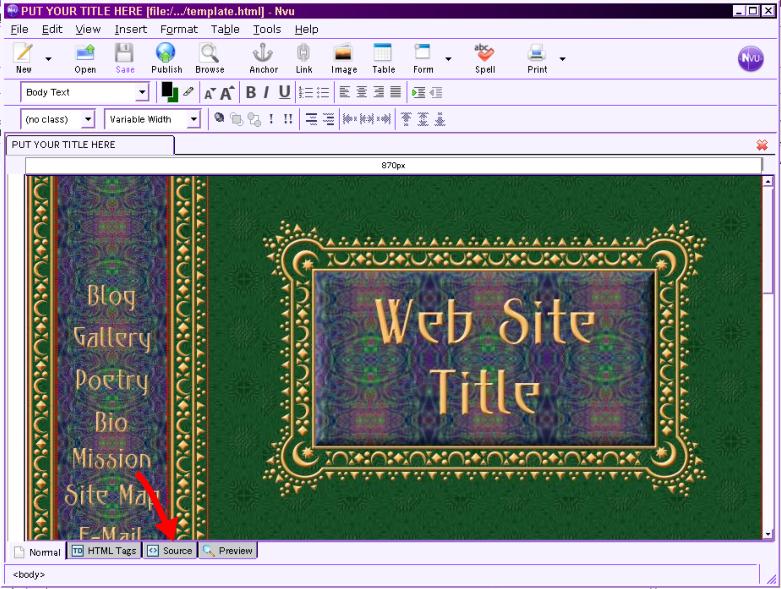
18. This will allow you access to the back end of your web page where all the gobbly gook code is. Here is where what is called "META" tags are that you want to customize for your web site so that people can bookmark your page and search engines will find you. The only part of this gobbly gook that you need to focus on is at the top of the page, customizing the areas I've highlighted to the content of your website. I have a before/after pic for you as an example with explanation. The highlighted words are a graphic enhancement, they will NOT be different colors as shown:
 Red highlight is the title tag you
change. The red arrow shows that the words you put here will
show to your web site visitor on the top of their browser window.
They are the words the page can be automatically bookmarked
as. Most importantly, it is the #1 way a page of a
site is indexed by search engines. Keep this 7 words or less,
usually the title of the site and maybe 3 or 4 words of description of
the page. Use the #1 word you think people will use to find
the content of this page in your title. Only type where the
red highlight is. DO
NOT change or delete a single character of the surrounding
text <title>
</title> if you change
those tags the page will not render properly.
Red highlight is the title tag you
change. The red arrow shows that the words you put here will
show to your web site visitor on the top of their browser window.
They are the words the page can be automatically bookmarked
as. Most importantly, it is the #1 way a page of a
site is indexed by search engines. Keep this 7 words or less,
usually the title of the site and maybe 3 or 4 words of description of
the page. Use the #1 word you think people will use to find
the content of this page in your title. Only type where the
red highlight is. DO
NOT change or delete a single character of the surrounding
text <title>
</title> if you change
those tags the page will not render properly. Green
highlight is the author
tag you change. Put the name of the owner and/or web master of
the site. This can be a company name. Only type where the
green highlight is. DO
NOT change or delete a single character of the surrounding
text <meta
content=" " name="author"> if
you change those tags the page will not render properly. The quote " marks must be there!
Missing quote marks in all this gobbly gook of code is
probably the number one reason pages don't view and/or index properly!
Green
highlight is the author
tag you change. Put the name of the owner and/or web master of
the site. This can be a company name. Only type where the
green highlight is. DO
NOT change or delete a single character of the surrounding
text <meta
content=" " name="author"> if
you change those tags the page will not render properly. The quote " marks must be there!
Missing quote marks in all this gobbly gook of code is
probably the number one reason pages don't view and/or index properly! Yellow
highlight is the description
tag you change. Put a 10-15 search term rich
sentence about the content of the page here. Use again, words
you think people would use in a "search" to find content of yours on
the net. Even if you have what you think are "great books" as
content, that is not usually what people put into search engines if
they are looking for that, more likely "novel reviews" or "historic
fiction" are things they would type. So think of that when
deciding what this sentence should say. Only type where the
yellow highlight is. DO
NOT change or delete a single character of the surrounding
text <meta
content=" " name="description">
if you change those tags the page will not render properly.
The quote "
marks must be there! Missing quote marks in all
this gobbly gook of code is probably the number one reason pages don't
view and/or index properly!
Yellow
highlight is the description
tag you change. Put a 10-15 search term rich
sentence about the content of the page here. Use again, words
you think people would use in a "search" to find content of yours on
the net. Even if you have what you think are "great books" as
content, that is not usually what people put into search engines if
they are looking for that, more likely "novel reviews" or "historic
fiction" are things they would type. So think of that when
deciding what this sentence should say. Only type where the
yellow highlight is. DO
NOT change or delete a single character of the surrounding
text <meta
content=" " name="description">
if you change those tags the page will not render properly.
The quote "
marks must be there! Missing quote marks in all
this gobbly gook of code is probably the number one reason pages don't
view and/or index properly! Pink
highlight is the key
word tag you change. Put a 15-25 search term rich
words that can be found
within the content of the page here. Use again,
words you
think people would use in a "search" to find content of yours on the
net, but the word/s must appear also in the content (text) of the web
page! If again, your page is about "great books" and you use
the key word "novel" but do not use that word in the text of the page,
it will not do you any good for search engine placement! So
think of that when deciding what the text and the key words should say.
Only
type where the pink highlight is. DO NOT change or
delete a single character of the surrounding text <meta
name="KeyWords" content=" "> if you
change those tags the page will not render properly. Separate
key words by a comma only! Not a space, the search robots
will stop indexing the key words when they come to a space.
The quote "
marks must be there! Missing quote marks in all
this gobbly gook of code is probably the number one reason pages don't
view and/or index properly!
Pink
highlight is the key
word tag you change. Put a 15-25 search term rich
words that can be found
within the content of the page here. Use again,
words you
think people would use in a "search" to find content of yours on the
net, but the word/s must appear also in the content (text) of the web
page! If again, your page is about "great books" and you use
the key word "novel" but do not use that word in the text of the page,
it will not do you any good for search engine placement! So
think of that when deciding what the text and the key words should say.
Only
type where the pink highlight is. DO NOT change or
delete a single character of the surrounding text <meta
name="KeyWords" content=" "> if you
change those tags the page will not render properly. Separate
key words by a comma only! Not a space, the search robots
will stop indexing the key words when they come to a space.
The quote "
marks must be there! Missing quote marks in all
this gobbly gook of code is probably the number one reason pages don't
view and/or index properly!The above list and explanations are the minimum of "Meta" tags you need to modify for each .html document you create from the template. There are many more "Meta" tags one could add, but they are not within the scope of this tutorial. Below is an example of how I chose to modify the above "Meta" tags for this tutorial. After you modify your meta tags, click "Save" as indicated by the red arrow.
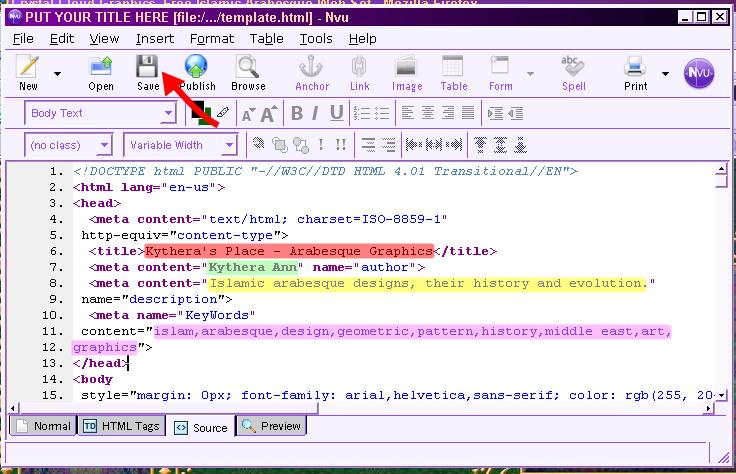
After clicking "Save" the program will automatically show you the "Normal" tab view you started with.
19. In the "Normal" tab view we will now customize the graphic elements for your web site's needs. The first thing you will want to do is change the "title graphic" from the one shown to the one you created in step 13. Rapidly double click the mouse button when the cursor is over the current page title graphic. A window will appear, click "Choose file."
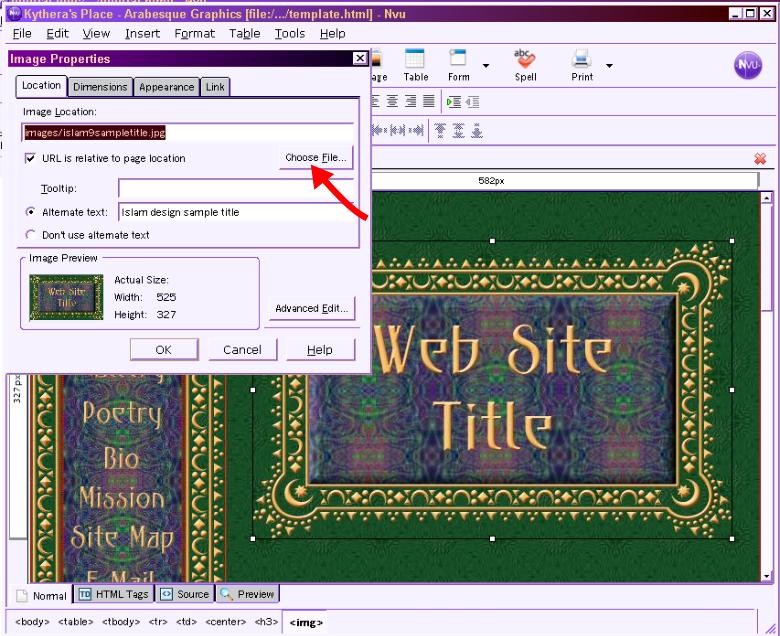
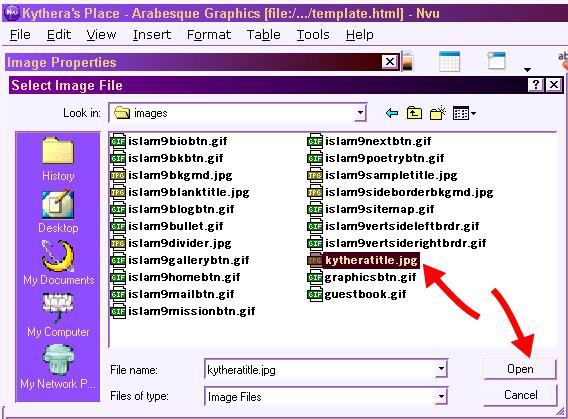
20. Another window will open.showing the files on your computer. Find the images folder that your new title graphic is saved in (must be the same image folder as all the other graphics for web page are in), highlight it and click "Open" as indicated by the red arrows:
21. The image file window will again open showing the new file name. You MUST change the "Alternate" text (see where the red arrow points) to be descriptive of the image.
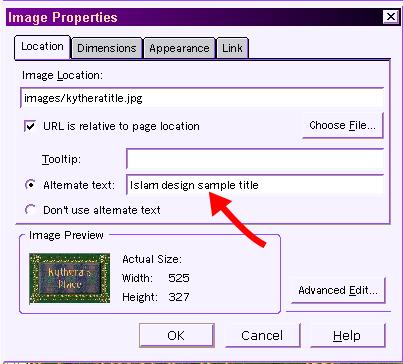
Ideally use a key word rich description (3-5 words only) like my example below. Why?
1. To help non graphic browsers and the seeing impaired to make sense of your site.
2. So "Image search engines" (Such as Google Images) can catalog your image correctly.
3. Search robots catalog the text and it helps your overall web site ranking in search engines if the terms of key words can be found in the text and image "Alternate" text.
2. So "Image search engines" (Such as Google Images) can catalog your image correctly.
3. Search robots catalog the text and it helps your overall web site ranking in search engines if the terms of key words can be found in the text and image "Alternate" text.
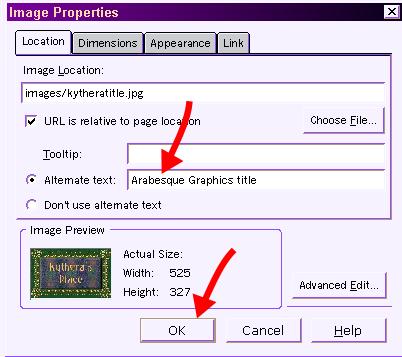
After changing the Alternate text, click "OK"
Now the page will appear showing your new graphic title image.
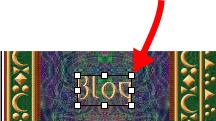
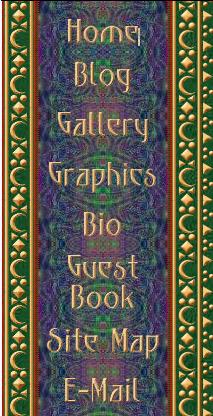
22. Next we will change the button image links and, where needed, images. These directions apply no matter where an image button appears on a template. First, on a separate piece of paper (or text file) make a list of all the pages and links you will want your visitors to be able to get to. If you have a bunch of pages that fall in the same category (such as articles or graphics) list them sub to the category. Your list should look something like this:
Home
Guest Book
Blog
Site Map
Graphics
Arabesque Backgrounds
Arabesque Designs
Arabesque Tiles
GalleryArabesque Designs
Arabesque Tiles
About Me (or Bio)
Now re-order the list in the order of logical flow through your site, the page a visitor sees first on top and the last thing you want them to see or do on the bottom with the email (or contact) button last, like this:
Home
Site Map
Graphics
Arabesque Backgrounds
Arabesque Designs
Arabesque Tiles
GalleryArabesque Designs
Arabesque Tiles
Blog
About Me (or Bio)
Guest Book
Make sure that you have all the buttons you will need already in your "images" file as described in instruction #13. You will only need images for those items I have bolded on the list, the sub pages will go to a new index and also can be located on the "Site Map."
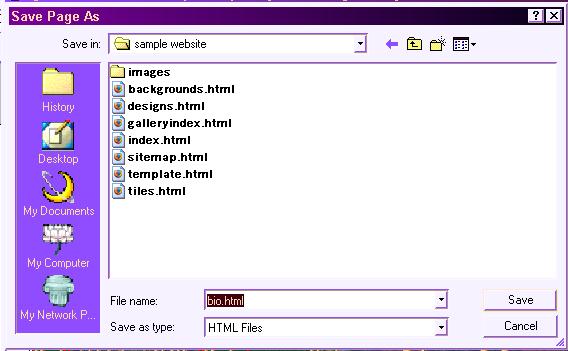
Next, write next to all the pages on the list what the file will be called or where the URL is as shown:
Home index.html (the top page of your site MUST be named this because the URL (page address) will always default to this page. Thus, http://graphics.elysiumgates.com automatically opens index.html on a browser.
Site Map sitemap.html (logical file names are always best, helps you to find the file and is advantageous for search engine ranking also). A good example of how you will eventually lay this page out can be found here: http://nancykoran.net/sitemap.html
Graphics graphicindex.html (for a good example of a sub index page, go to http://masonic118.com/main.html then click on "Masonic Articles"
Arabesque Backgrounds backgrounds.html
Arabesque Designs designs.html
Arabesque Tiles tiles.html
Gallery http://www.flickr.com/ This
is often on a different place on the web than the rest of your site, if
so, be sure to put the ENTIRE URL here. Flicker galleries are a
good example so I've used their general URL for this example.Arabesque Designs designs.html
Arabesque Tiles tiles.html
Blog https://www.blogger.com/ This is often on a different place on the web than the rest of your site, if so, be sure to put the ENTIRE URL here. Blogger blogs are a good example so I've used their general URL for this example.
About Me (or Bio) bio.html
Guest Book http://graphics.elysiumgates.com/cgi-bin/guestbook/guestbook.cgi This URL is usually part of a different folder on your site or provided by a service, again, put the ENTIRE URL here. I've used my graphic guest book as the example (an awesome customizable guest book service by http://active-scripts.net/ that is free for personal use, NO SPAM!)
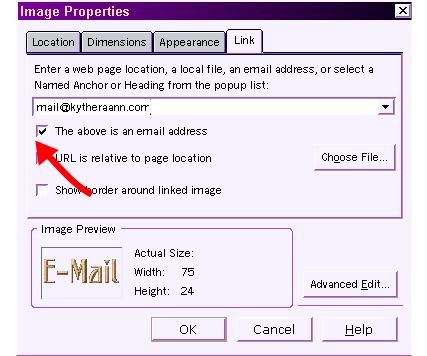
E-Mail mail@kytheraann.com
When your list is done as above, you are ready to return to continue modifying the template page for your website.
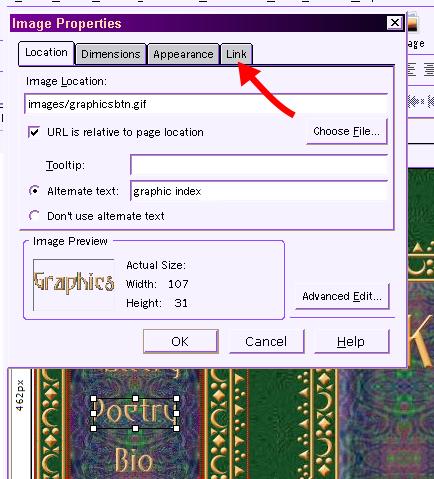
23. Locate the graphic buttons on the web template. Are there any that need to be changed? If so, follow the steps 19-21 again by double clicking the button image you want to swap, locating the graphic button you do want and changing the alternate text to be what is appropriate, at this point DO NOT click "OK", instead click the tab of the window that says "Link" as shown.
24. The image properties "Link" window will now open. Whether there is text where the red arrow points or not, replace it with the link you want this image to lead to. Do not change radio buttons or check marks on any of the windows throughout this tutorial unless instructed. The correct defaults are automatically set in the program.
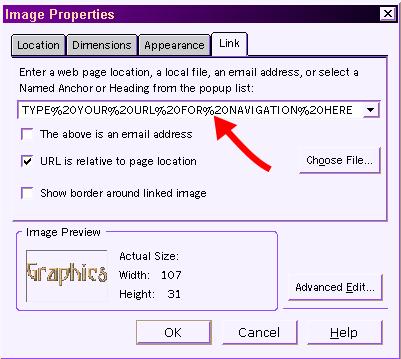
In this example, the link will be "graphicindex.html" as shown. After typing the file or URL in, click "OK"

After clicking ok, you will automatically see the new graphic button linked in the program view.
25. Next I will be swapping out the "Mission" button graphic for a new "Guest Book" button graphic, all the steps to do this are identical 19-21, 23 and 24. The only slight difference, is because this is a guest book button link, it requires a full URL as shown, don't forget the http:// ! Then click "OK"

After clicking "OK", you will automatically see the new graphic button linked in the program view.
26. For this demo I don't need to swap out any more button graphics or delete any. If I needed to delete a button graphic (or any graphic), I would place my cursor over the graphic and click it once which would then show being highlighted, like the example below. When it is, click the "Delete" button on your keyboard and it will go away.
27. Instead, I need for this demo to link the rest of my existing buttons. I will do this by clicking twice on the button graphic, thus opening the "Image Properties" window and then again clicking the "Link" tab and following the examples of steps 24 or 25 with the appropriate links. A couple of special notes:
- E-mail link: Be sure to check box in the "Link" tab view as shown:
- If the link goes to a URL that is not where your website is, such as the "Blog" link (https://www.blogger.com/) of this example, you will want the link to open in a new window. This is because https://www.blogger.com/ has no way to get back to my example page without me clicking my "back" button on the browser. So this helps you to keep visitors on your site and not getting lost on another site. To accomplish this you need to revisit the gobbly gook HTML of the template by clicking the "Source" tab at the bottom of the program like shown in step 17. Then locate the place where the URL for this button is located as shown:
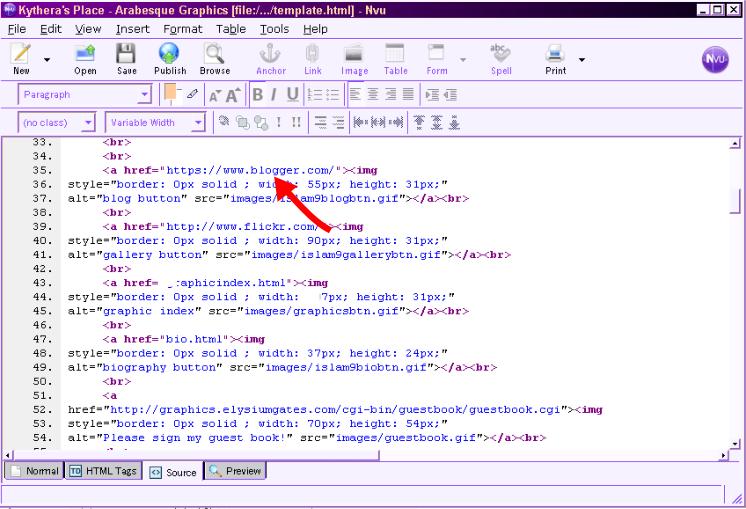
Now type in target="_blank" exactly where shown below, do not delete any characters!
While there I see the two other button links I have that will go
to other URLs so I do the same for them. The page should now look
as shown:
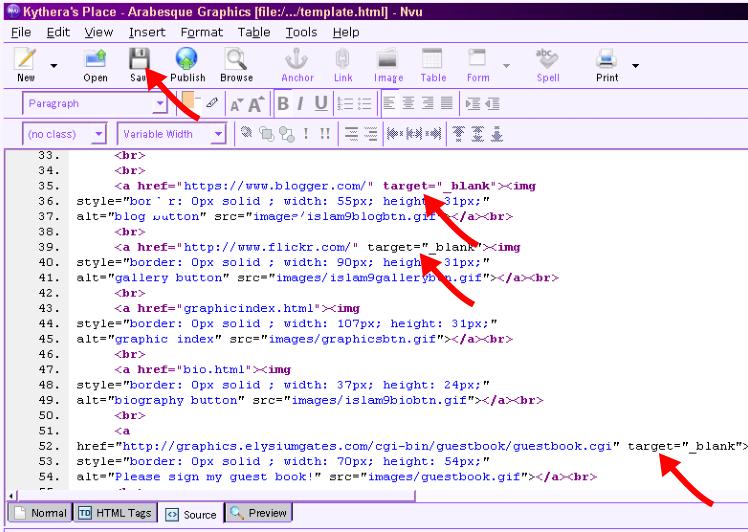
After adding the "target" comments where indicated, click "save" and again the program will automatically open the default image view of the template.
28. Now the button images are the ones I want and linked the way I want, but they aren't in the order I wanted in my list instruction number 22. So to change the order... oops! No home button, I better go make one and insert it first! Here is how to insert a button. First place your cursor where you want the image to appear and click the mouse once, then click the "Image" button at the top of program as shown:
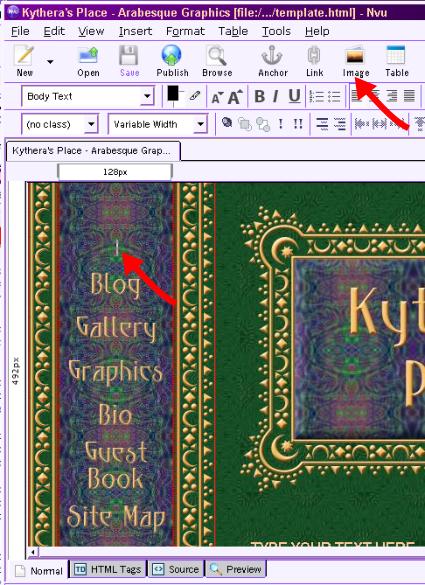
The "Image Properties" window will again open. Choose your file as shown in step 19 and be sure to add an alternate text as in step 21. If the image is to be linked, as this one is, you will then open the "Link" tab of the "Image Properties" window and insert the link, remembering the various instructions about links from steps 24, 25 and 27. When all is done, my "Home" button is now linked and in place as shown:
29. Back to changing the order of these graphic buttons to match my list. I want "Site Map" to be under the "Home" button, so I place the cursor over the "Site Map" graphic and click the mouse button once and keep it depressed. While the button is depressed I move the mouse so that the cursor is right under the "Home" graphic. I release the mouse button, and the "Site Map" button is moved to under the Home button as shown:
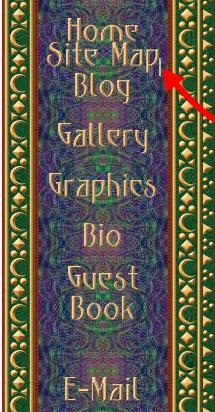

Notice that the buttons are too close. So I place my cursor at the end of the image (as shown) and click the mouse once, then press the "Enter" key on the key board to give it more space. I repeat these actions of moving buttons and adding space between them, (or deleting spaces, place cursor and click in space you want to delete then press "Delete" key) until they are in the order I want as shown on the right.
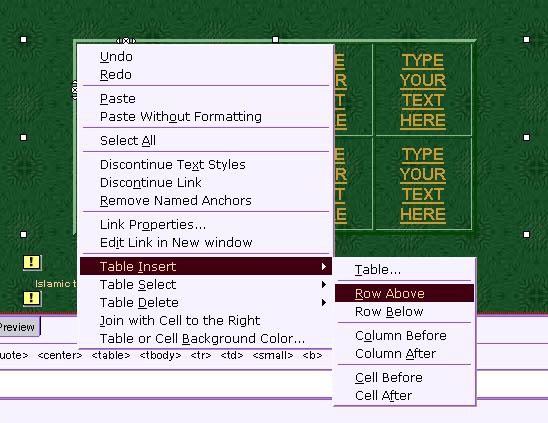
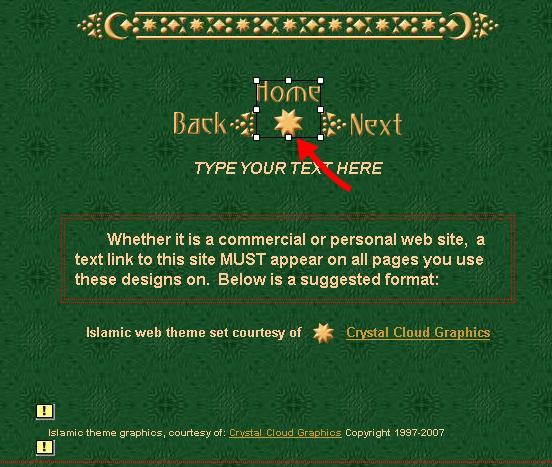
Now that the Menu and tile has been customized, it is time to customize other elements I want to on the page. I am going to focus now on this section of the template. I am creating a template page for my new site, not the actual pages, so for now where it says "enter text here" can be ignored with the exception of the table which are links.
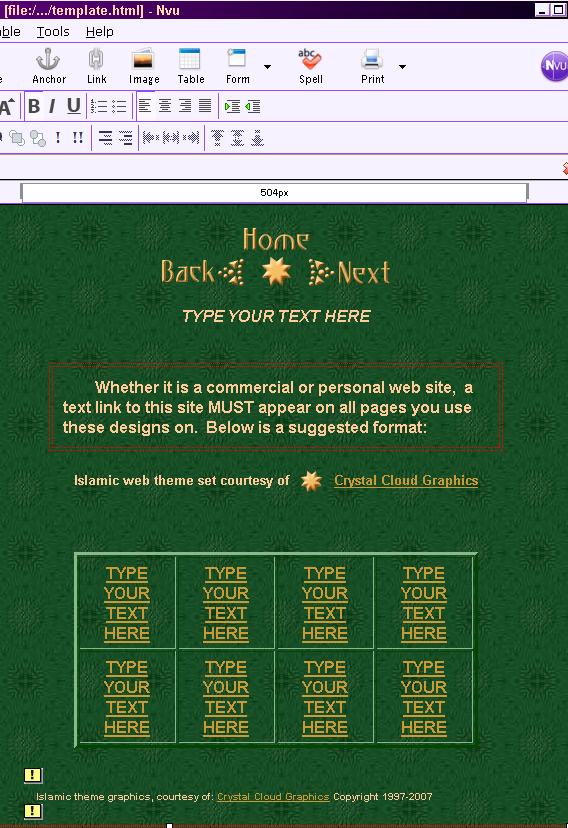
30. For my purpose, I do not want the table, but you might, so to customize a link in the table, first place your cursor at the beginning of the word "TYPE" and click your mouse and hold the button down, all the text will light up as shown.
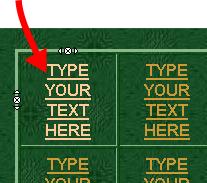
Highlight (with mouse button depressed drag the cursor) over the words. Release the mouse button and start typing the words you want. Then repeat the highlighting action over the words you have just typed (as before) and then click the "Link" icon at the top as shown:
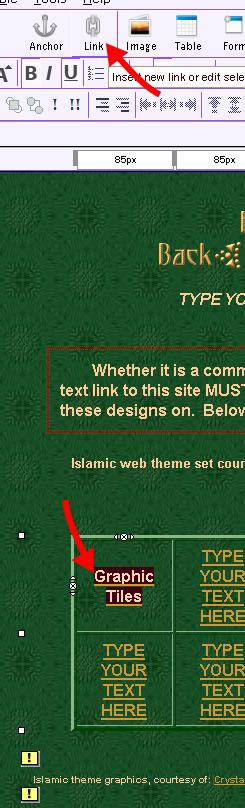
31. A "Link Properties" window will open and there are two things you must do and two others if applicable.
1. Type in
the file name you want to link to in the highlighted area OR put the
entire URL (with the http://)
2. If you typed a full URL to a site other than the one this page resides click the box under "Target".
3. If you type an email address as a link, click the box under the email address you typed that says "The above is an email address"
4. Click "OK" and the window will close and the Text link will be done.